Administrator

The administrator's role in accounting software grants comprehensive control and oversight over the entire system. Administrators have the authority to manage user accounts, set permissions, configure system settings, generate reports, and ensure data security. With their elevated access rights, administrators play a pivotal role in maintaining the integrity, efficiency, and security of the accounting software. The administrator possesses the authority to establish Company/Organization settings and configure Modules/Applications.

1. Dashboard

The administrator dashboard provides a visual representation of sales, assets, bank details, total sales, total invoices, and invoice dates through charts and diagrams.

The administrator conveniently locates crucial data within a unified dashboard, allowing for easy identification of financial transactions.

2. Setup

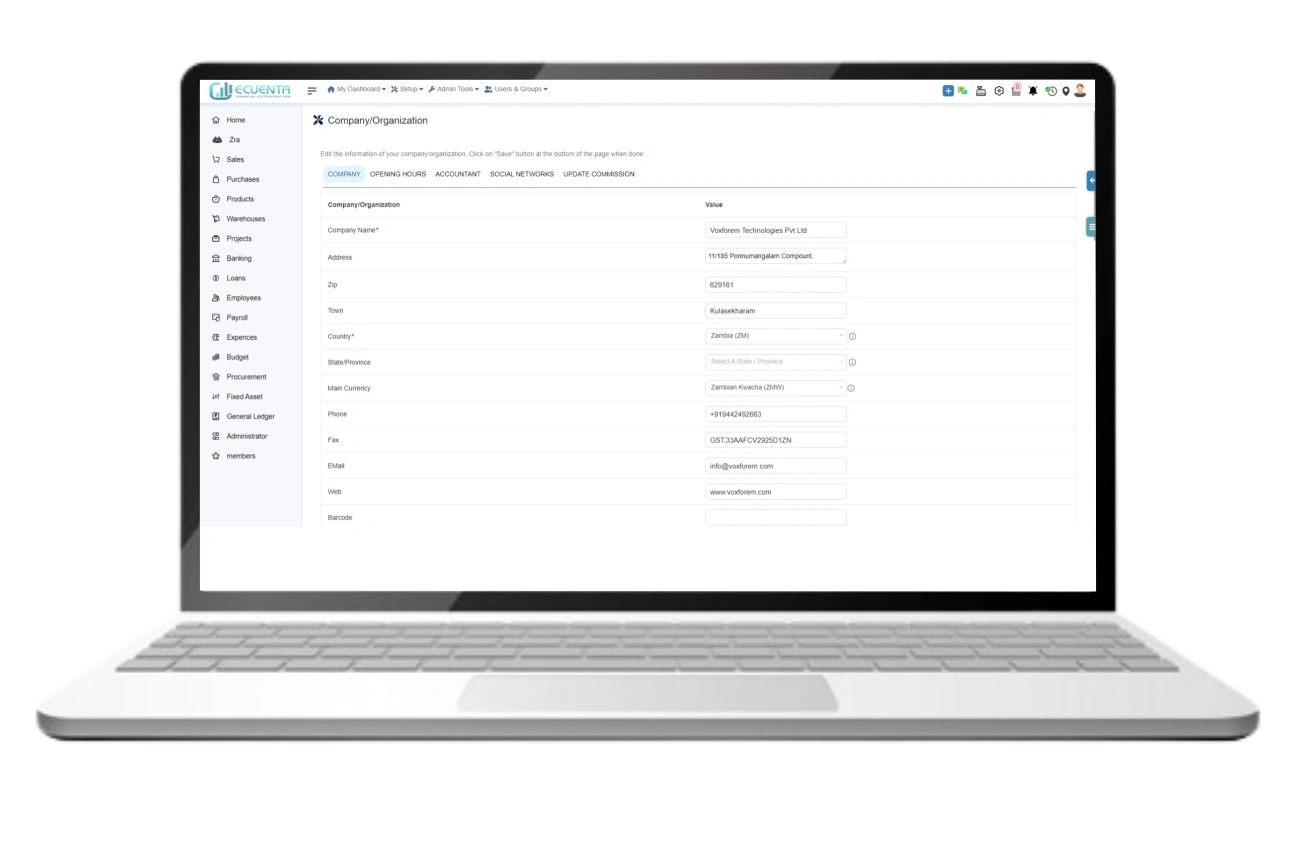
2.1 Company/Organization

Only the administrator has the authority to modify your company/organization details.

Within this interface, you can update the company details and save your changes. Once saved, the modifications will be reflected in the company details page.

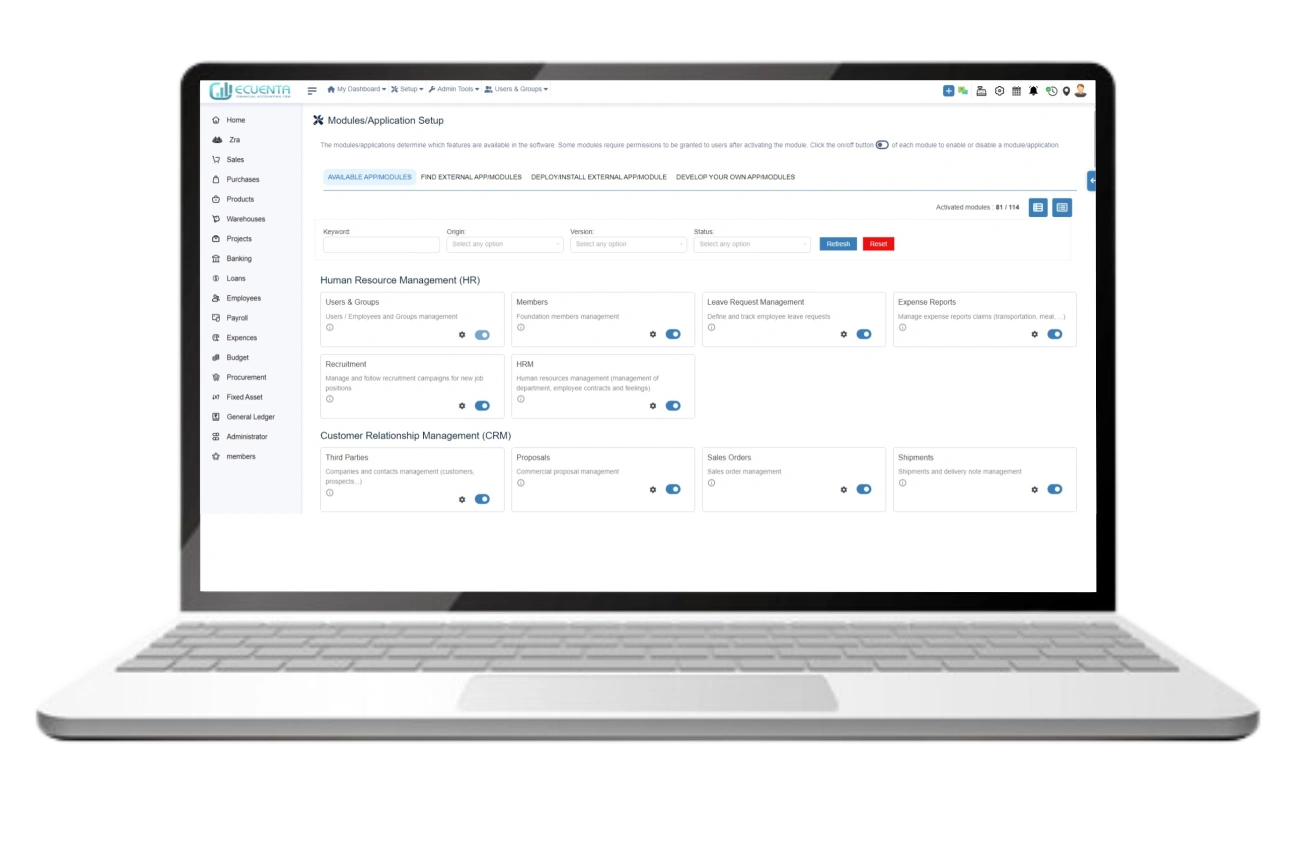
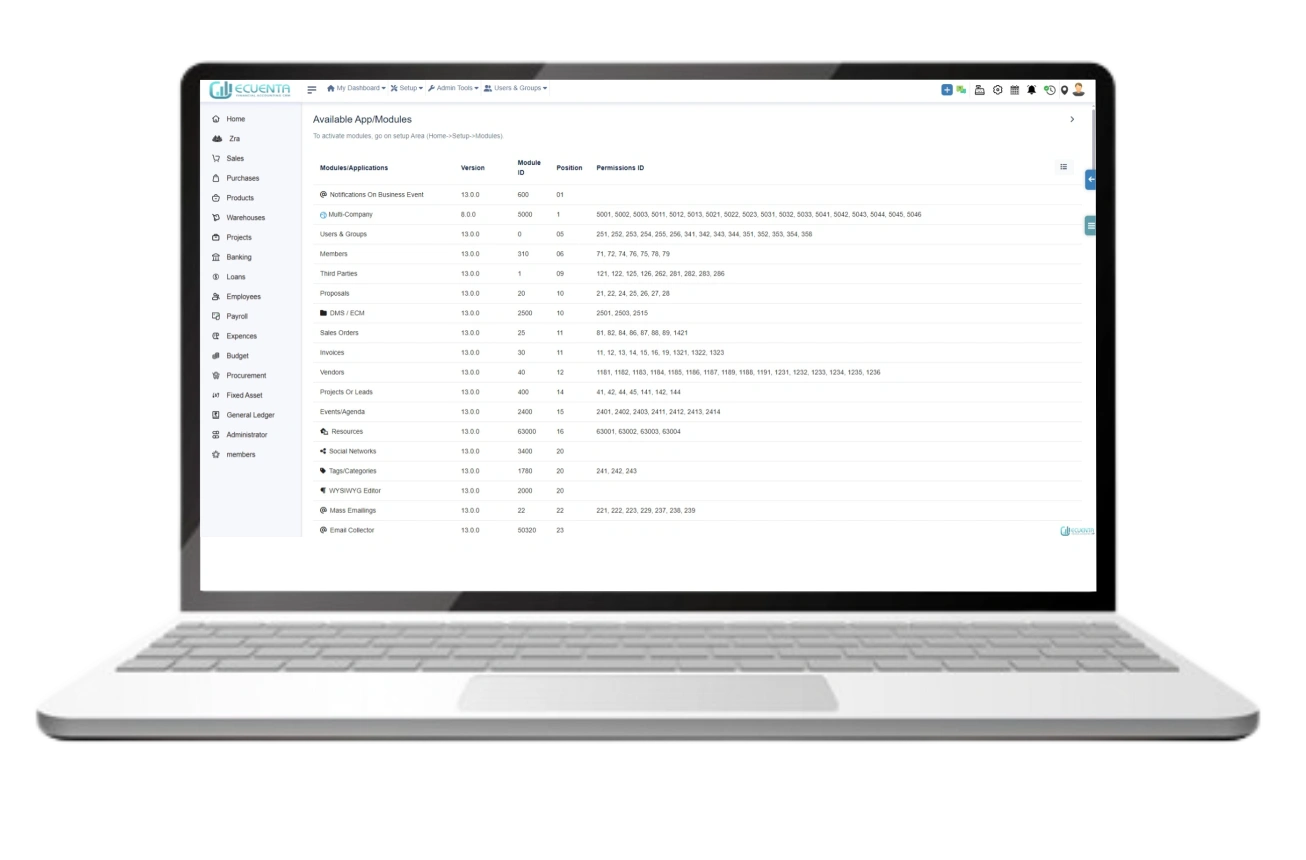
2.2. Modules/Application Setup

This section displays all the features available within the application.

The Modules setup functionality allows checking the availability of modules, activating or deactivating them, and editing their configurations.

Here, you have the option to install external modules from external sources. The module will then appear on the 'Available app/modules' tab.

If you possess coding knowledge, you can develop your module using the Native Module Builder Wizard.
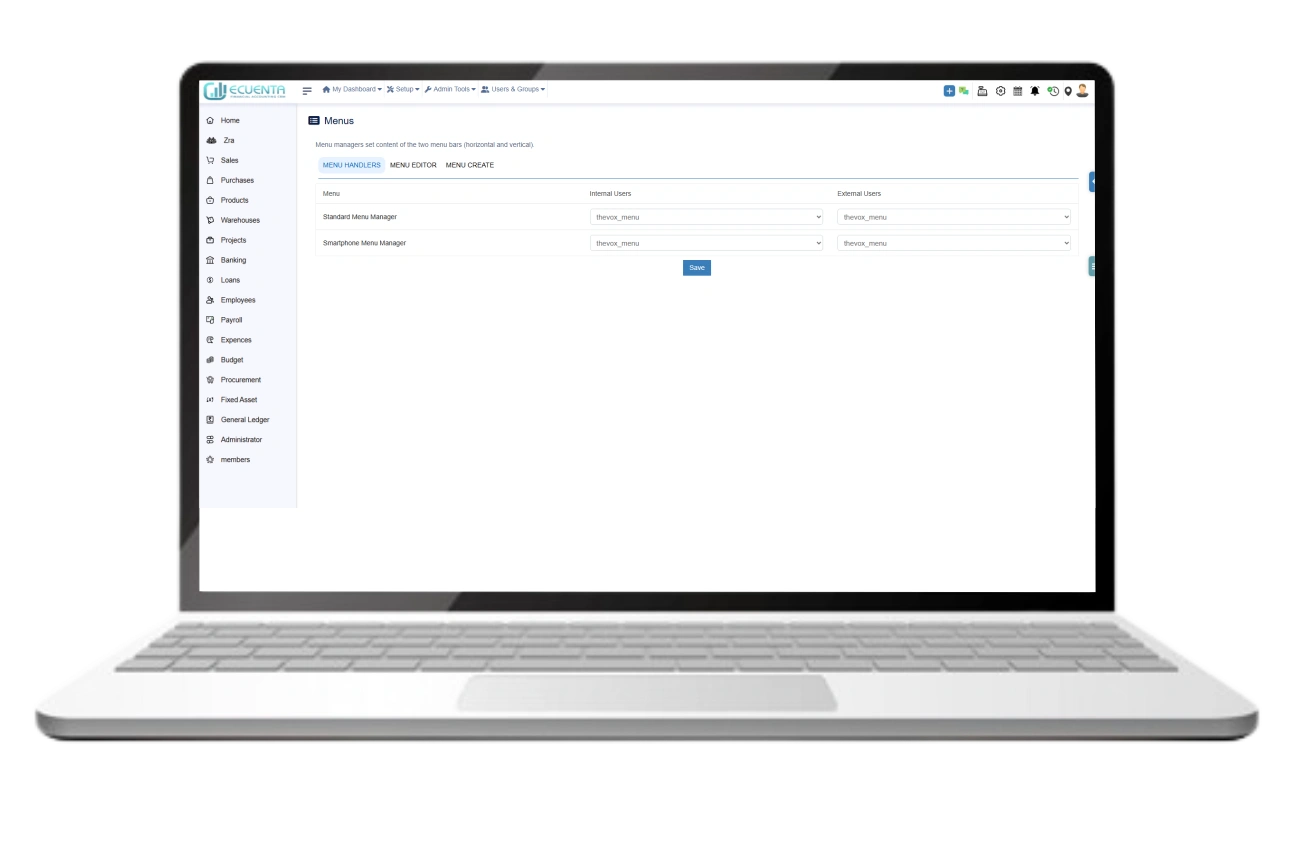
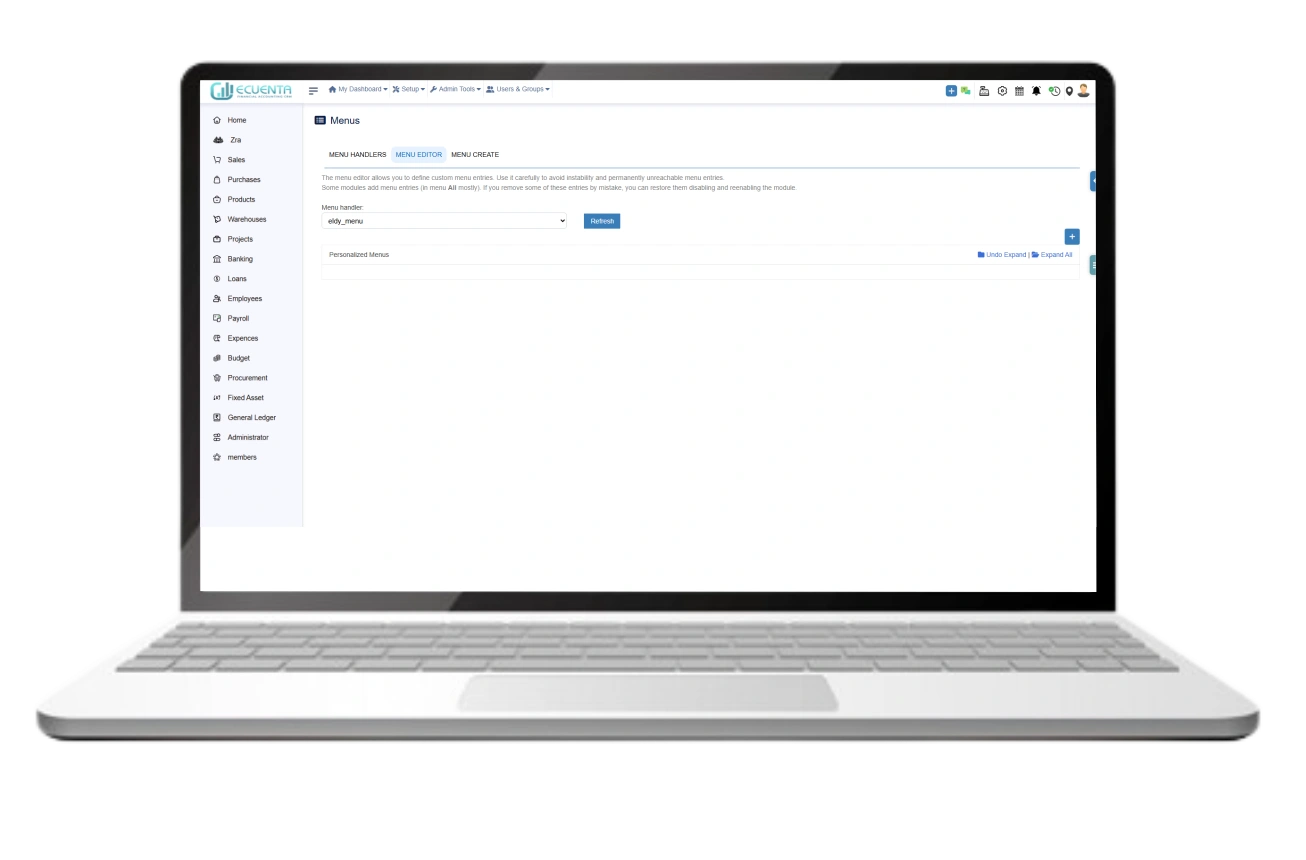
2.3. Menus

The menu setup is the next step for an administrator module.

Using the menu functionality, administrators can manage, edit, and create menu sections.

The menu handler manages both the standard menu manager and the smartphone menu manager. Menu styles can be set separately for internal users and external users.

The menu editor enables you to define custom menu entries, thus personalizing the menu handler.

When creating a new entity, no menus are initially available within that specific entity. With this menu function, you can easily generate a menu for a particular entity.
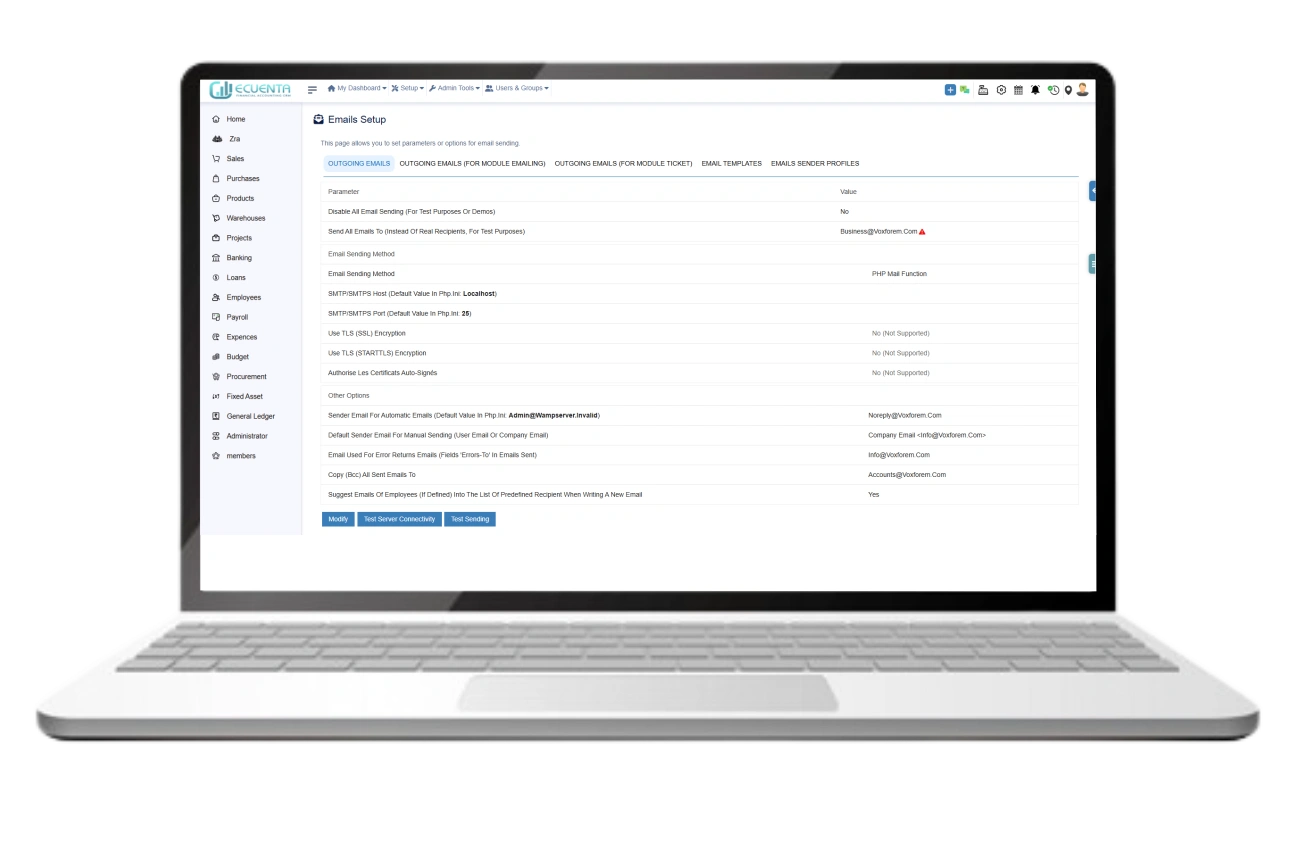
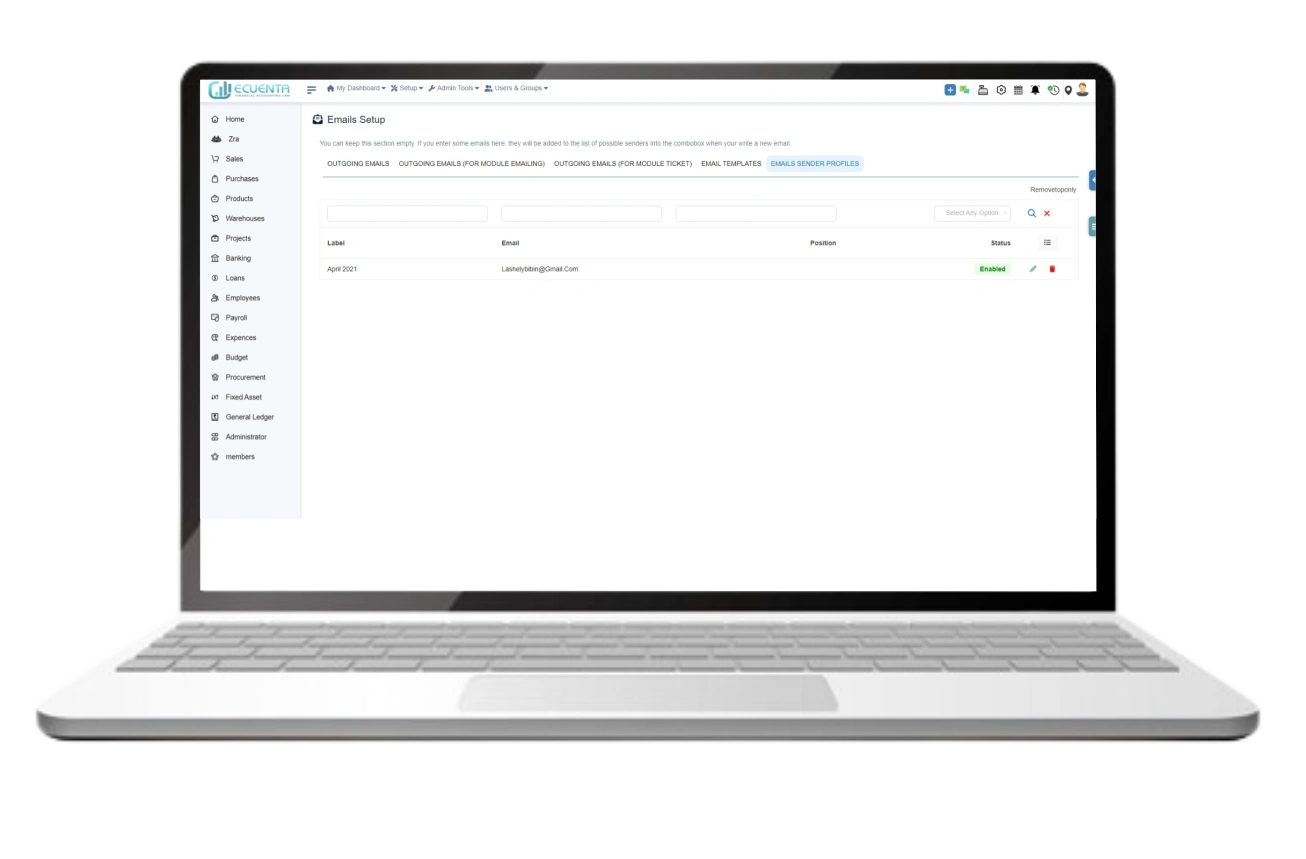
2.4 Emails Setup

You can send emails through the application using the SMTP/SMTPS host and port method.

Prior to submitting an email, ensure you have the sender's and recipient's email addresses, as well as the error return email ID.

If you want to send mail, you can set the delivery acknowledgement, subject, sender, receiver, and error mail and attach your file to inside the sending mail.

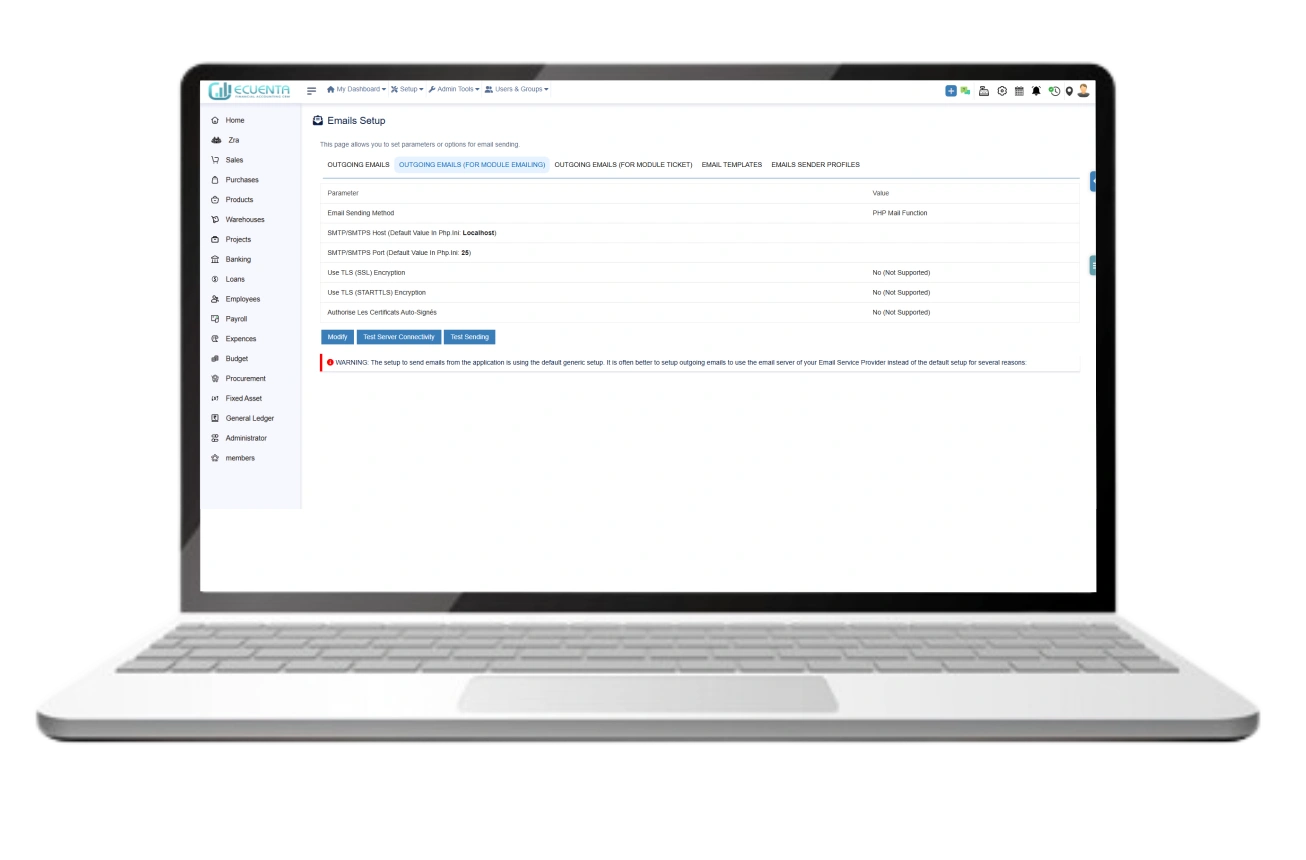
In outgoing emails, you have the option to configure and adjust mail settings, including SMTP/SMTPS host setup, SMTP/SMTPS port setup, and selection of SSL and STARTTLS encryption.

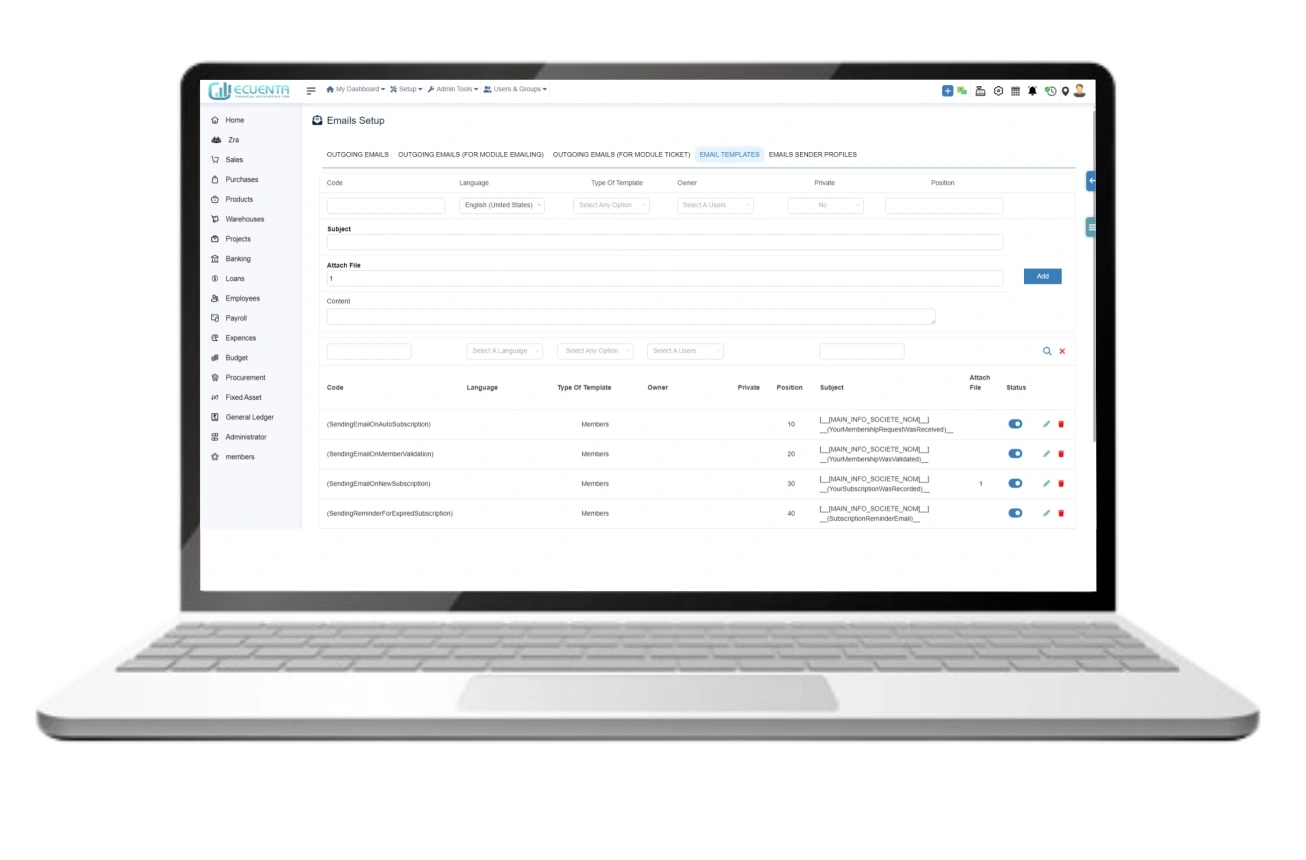
In the email template section, you can select the language, template type (user, public, or private), and position.

Currently, you can attach a file and specify a subject value using this template.

Likewise, you can configure a mail sender profile using this form, including label value, sender email, position, and status.

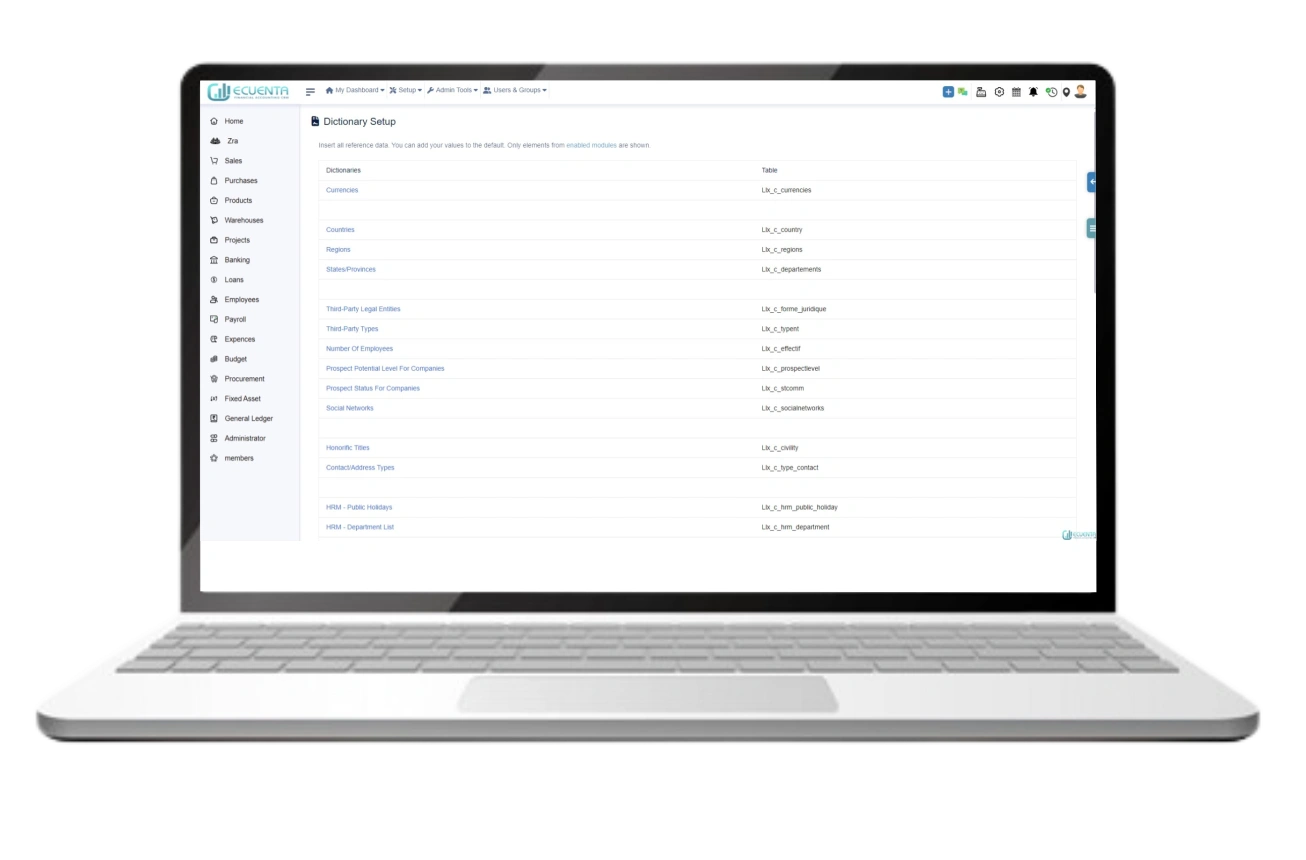
2.5 Dictionary Setup

The collection of default values and reference data for all elements is referred to as a directory

3. Admin Tools

3.1. Modules/Applications

This section provides an overview of available apps/modules, including details such as version, ID, and position of each module.

3.2. Check Integrity Of Application Files

This functionality enables you to easily find both the installed version and the latest upgraded version of the program.

3.3. About Browser

In this section, you can locate details such as browser name, operating system, version type, IP address, session name, session ID, and screen resolution.

3.4. About OS

In this section, the operating system specifies the type and version of the PHP installation, which is noted accordingly.

3.5. About Web Server

In the web server section, details such as the server version, server name, IP address, port value, and root directory are available for reference.

3.6. About PHP

Here, you can assess the comprehensive functionality of PHP. This includes checking whether the extensions are correctly loaded, conducting function tests or not, and verifying various PHP-related technical functionalities, all in one convenient location.

3.7. About Database

Likewise, within this section, you'll discover database-related information consolidated in one place. This encompasses details such as the database version, hostname, port value, username, encrypted password, and various other pertinent data, all conveniently displayed on a single screen.

3.8. Backup

With MySQL, exporting the backup file is straightforward. Once downloaded, you have the flexibility to rename the data as desired.

We utilize MySQL Dump (Mysqldump) and MySQL Dump (Php) for data backup. These two options enable seamless exporting of your backup.

3.9. Upgrade

You can easily upgrade the version of Ecuenta by following a few steps and checking the current version details.

3.10. Purge

This feature enables you to remove all temporary files within the application.

3.11. External Resources

The external resources section includes the license number, repository URL, help centre link, demo URL, and other pertinent external information associated with the URL.

3.12. Global VAT Update

In this section, you can adjust the VAT value according to the country's specific regulations for value-added tax.

4. User & Groups

Inside the company/organization, you can establish both new users and groups. We will explore the steps involved in adding individual users to your system and organizing them into groups for easier management of permissions and access levels. Whether you are an administrator responsible for setting up accounts for your team members or an individual user looking to create your account, this will provide you with the necessary information and steps to accomplish your goals.

4.1. New user

Log in to the accounting software with administrative privileges.

To create a new user, you must gather essential details such as the user's full name, address, and contact information, select the validator for the specific user, and specify the commission percentage.

Once a user is created, the administrator can manage various aspects in the user details dashboard. This includes regenerating a password, listing the user's groups, generating linked files, setting permissions, assigning tasks or activities, configuring event notifications, and adding notes.

Additionally, professional details such as the employee NRC, user colour, categories, language type, signature, employment date, and date of birth are required when creating a new user.

Each user possesses a social media profile, thus allowing you to input the user's social media profile details here.

If the user is an employee, they should be able to include bank details, shift information, monthly salary grade, and their leave preferences.

Get In Touch